

 From the ages of 7-12 I would spend a week each summer at Camp Conrad-Chinnock, a camp for type 1 diabetics. Some of my favorite childhood and pre-teen memories were made there...like my first kiss :)
Every day each cabin had a specific time where they would get to go to the craft shack. I always looked so forward to this. It was like a kid's craft heaven. There was everything you could imagine there. My favorite things to make were lanyards and glass beaded necklaces and bracelets. I always came home with a suitcase full of these two things. While glass beads aka seed beads have somewhat of a nostalgic feel to them I also think they can be fun for adults to wear as well.
In all honesty I had no idea how in the world you made bracelets with fancy things like lobster clasps and jump rings before this project. Thanks to the ladies working at Hobby Lobby I now know, although I am pretty sure they wanted to (run) be paid extra on the days where I came in with questions.
 What you will need:
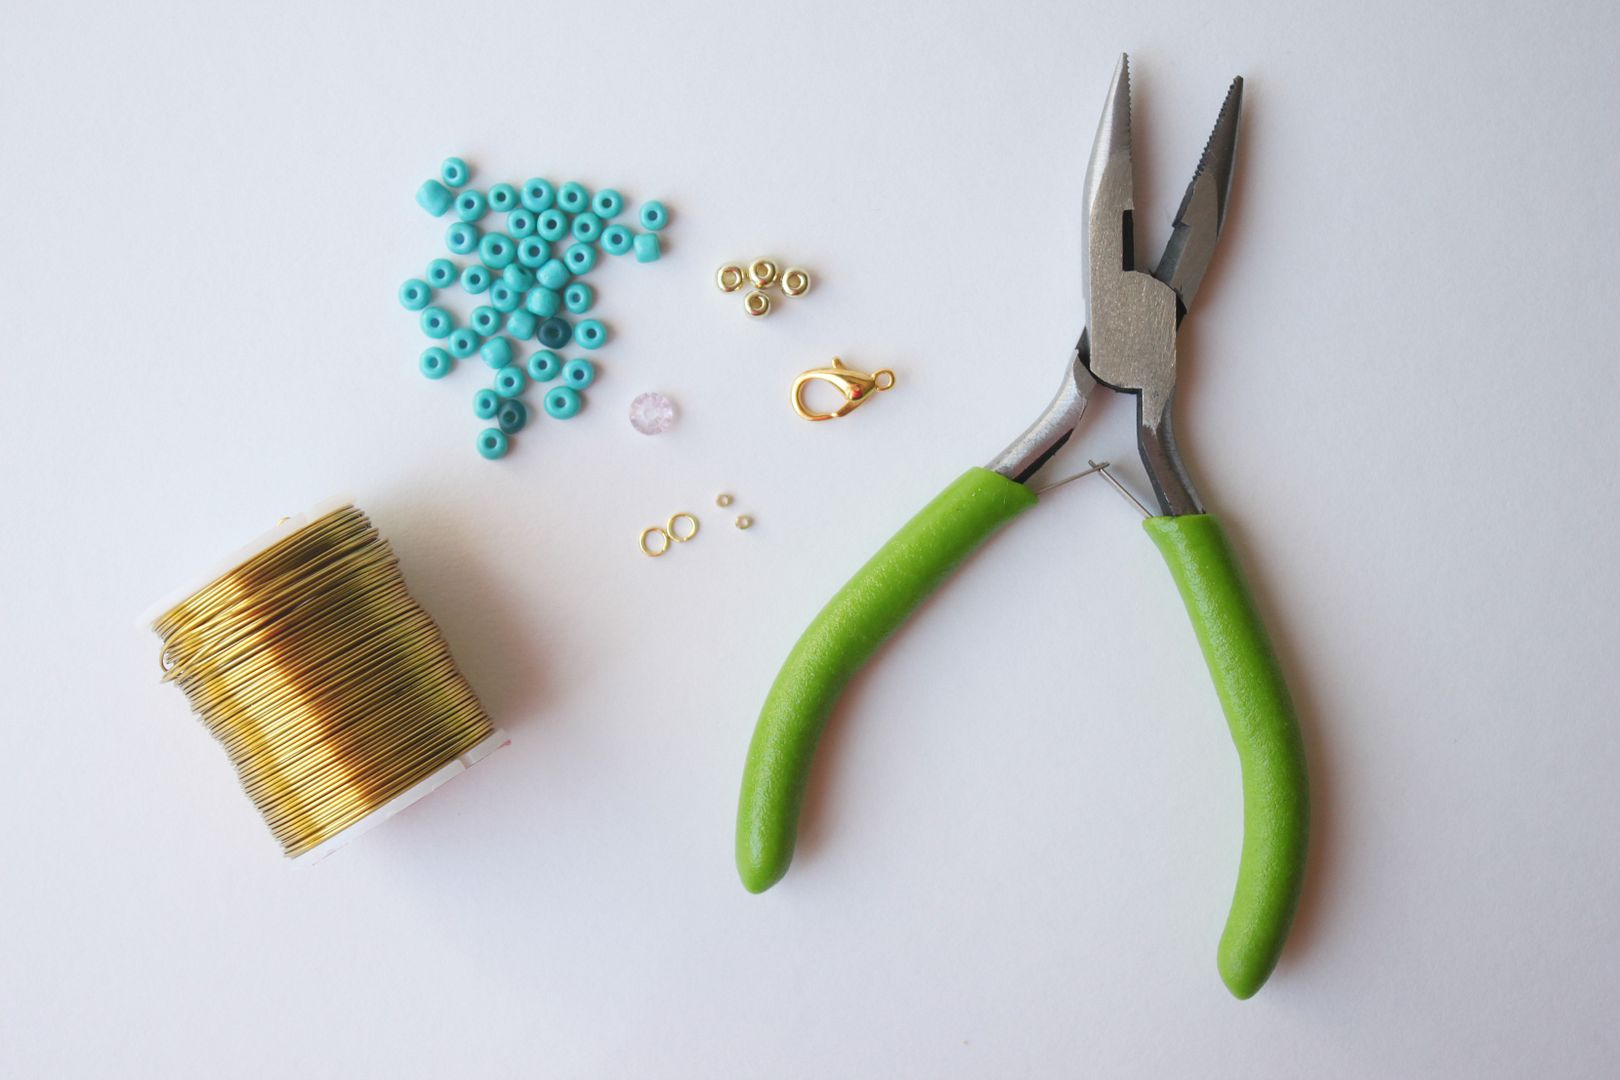
- Colorful glass beads+ spacer beads (I used gold)
- Gold beading wire
- Lobster clasps
- Crimp beads
- Jump rings
- Chain nose pliers
 Use scissors to cut your wire according to your wrist size. Attach the crimp bead and lobster clasp to one of the ends.
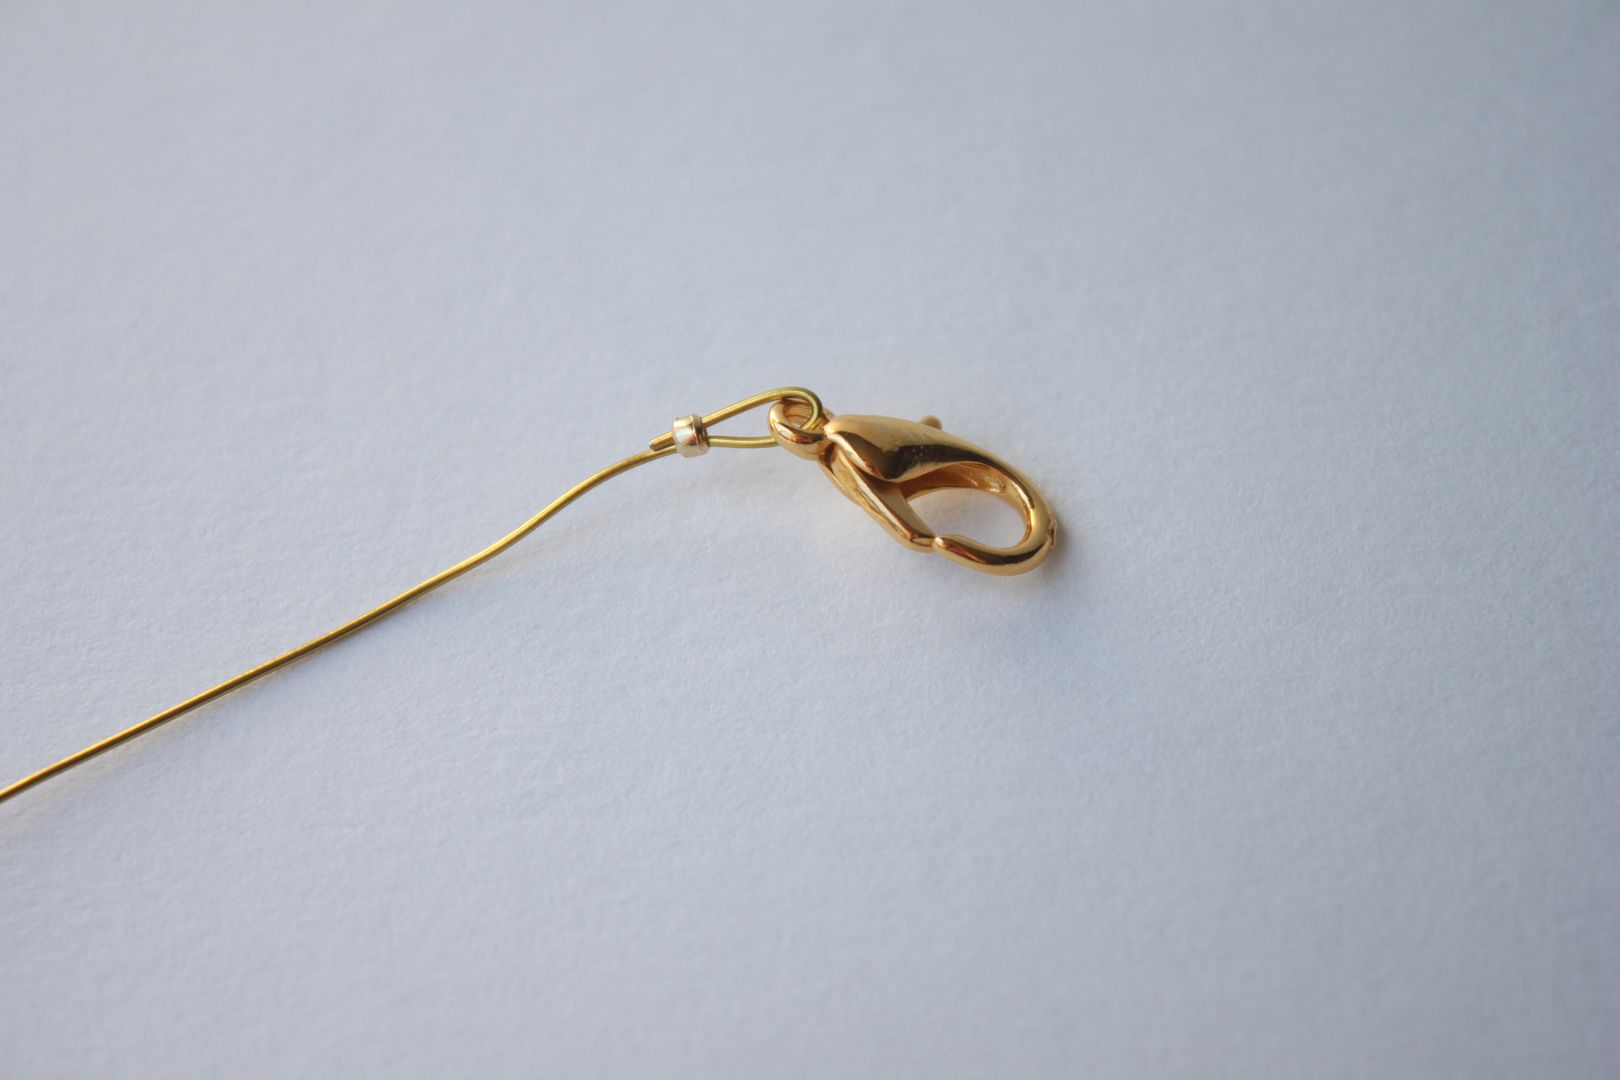 Bend
the end of the wire to make a loop and string it through the crimp
bead. Use the pliers to clamp the crimp bead so it closes.
Bend
the end of the wire to make a loop and string it through the crimp
bead. Use the pliers to clamp the crimp bead so it closes.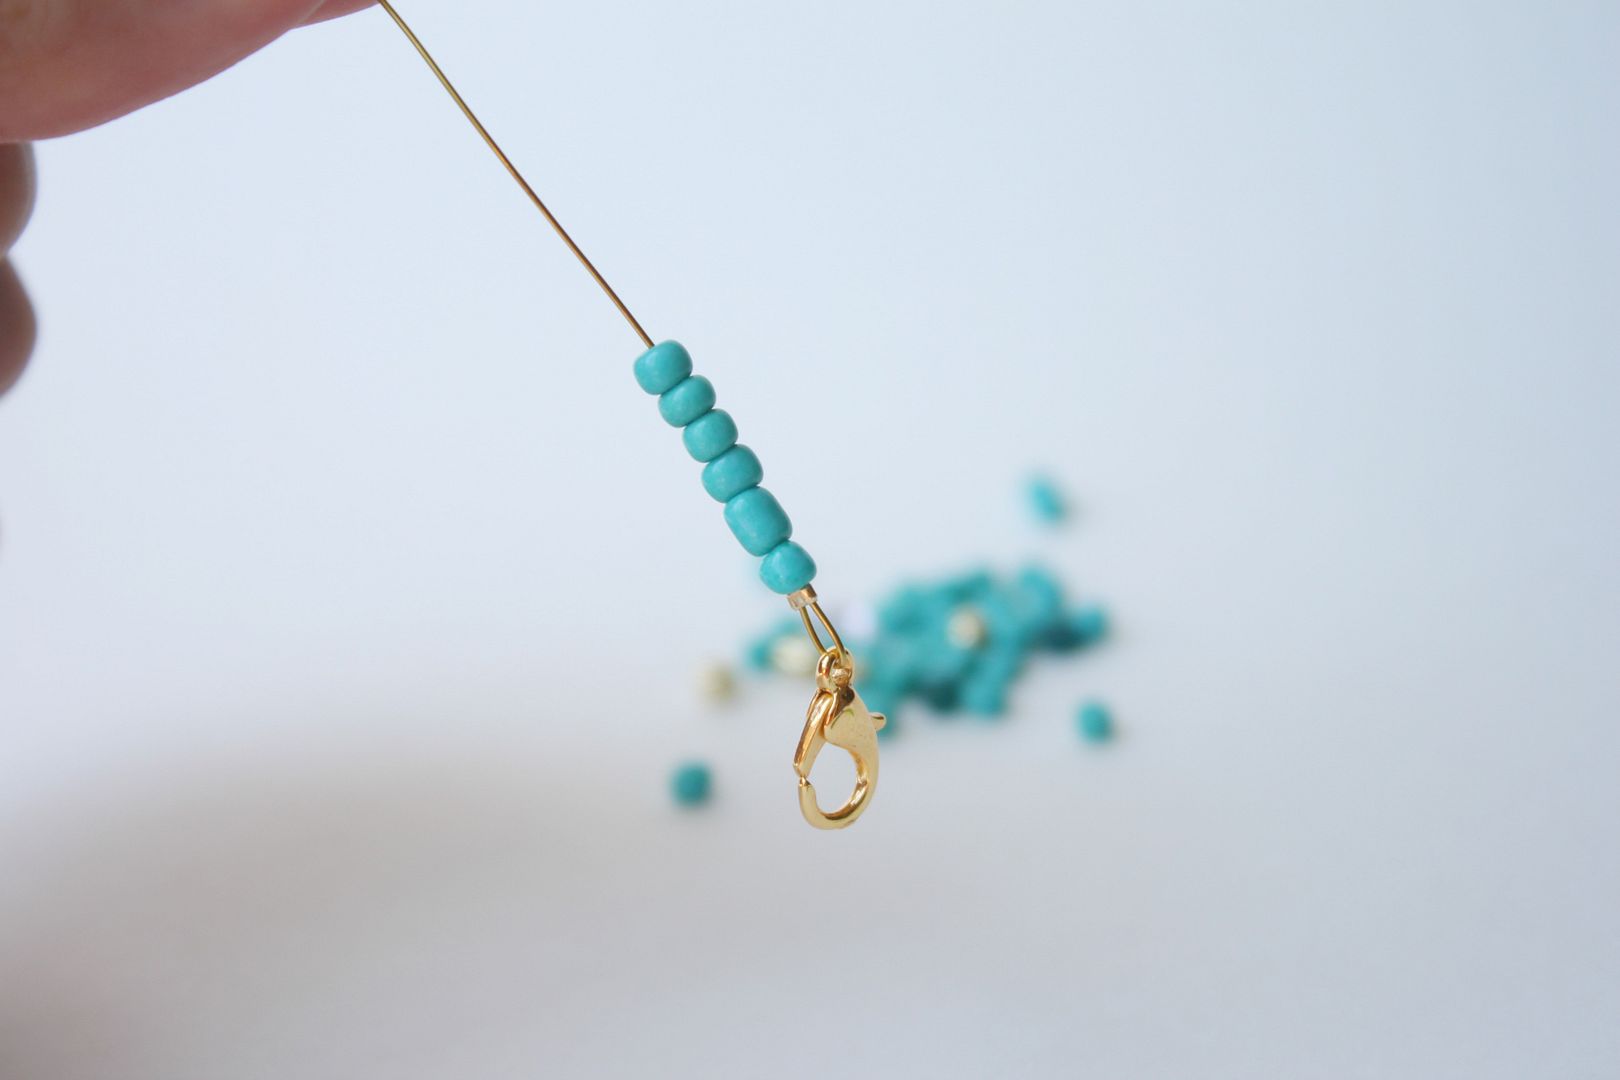 Begin stringing your beads on...
 When
you reach the end, place a crimp bead there and make another loop with
the end of the wire just like you did in the beginning. Make sure you
leave yourself enough slack. It is always better to start with a longer
piece of wire rather than a shorter one just in case you need more
room.
When
you reach the end, place a crimp bead there and make another loop with
the end of the wire just like you did in the beginning. Make sure you
leave yourself enough slack. It is always better to start with a longer
piece of wire rather than a shorter one just in case you need more
room.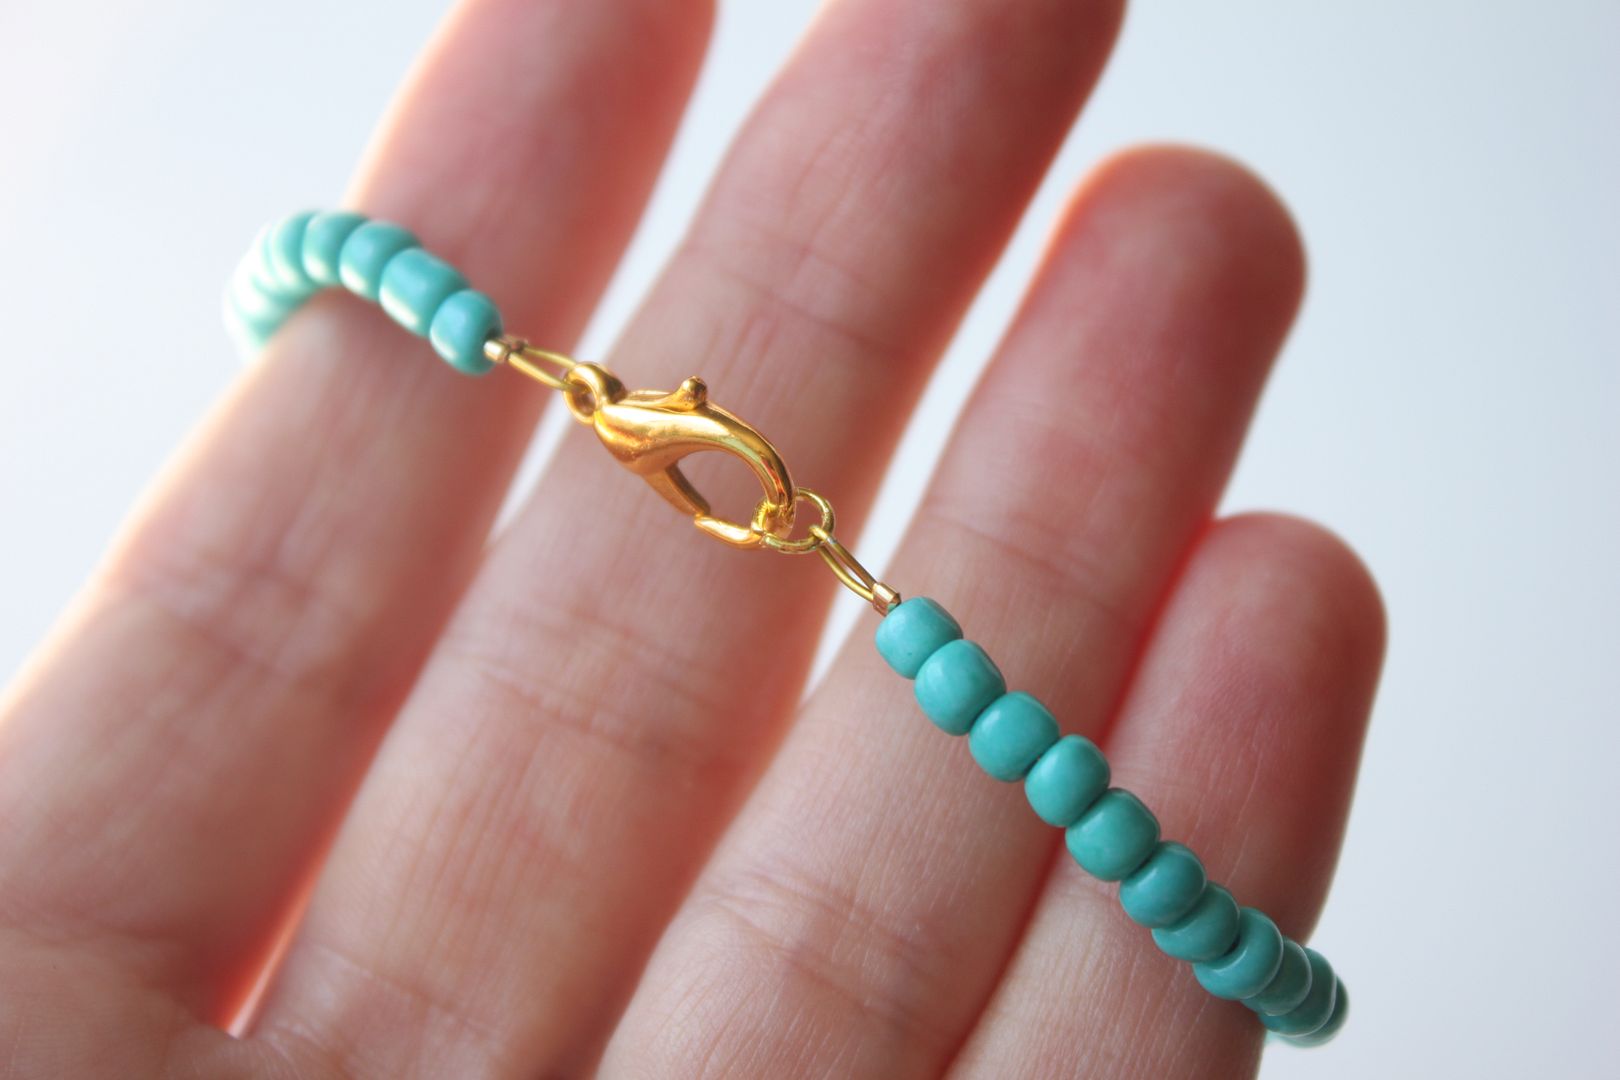 Using
your pliers, open the jump ring and attach it to the end of the loop.
You actually can skip this step if you want but I think it makes it look
more finished.
Using
your pliers, open the jump ring and attach it to the end of the loop.
You actually can skip this step if you want but I think it makes it look
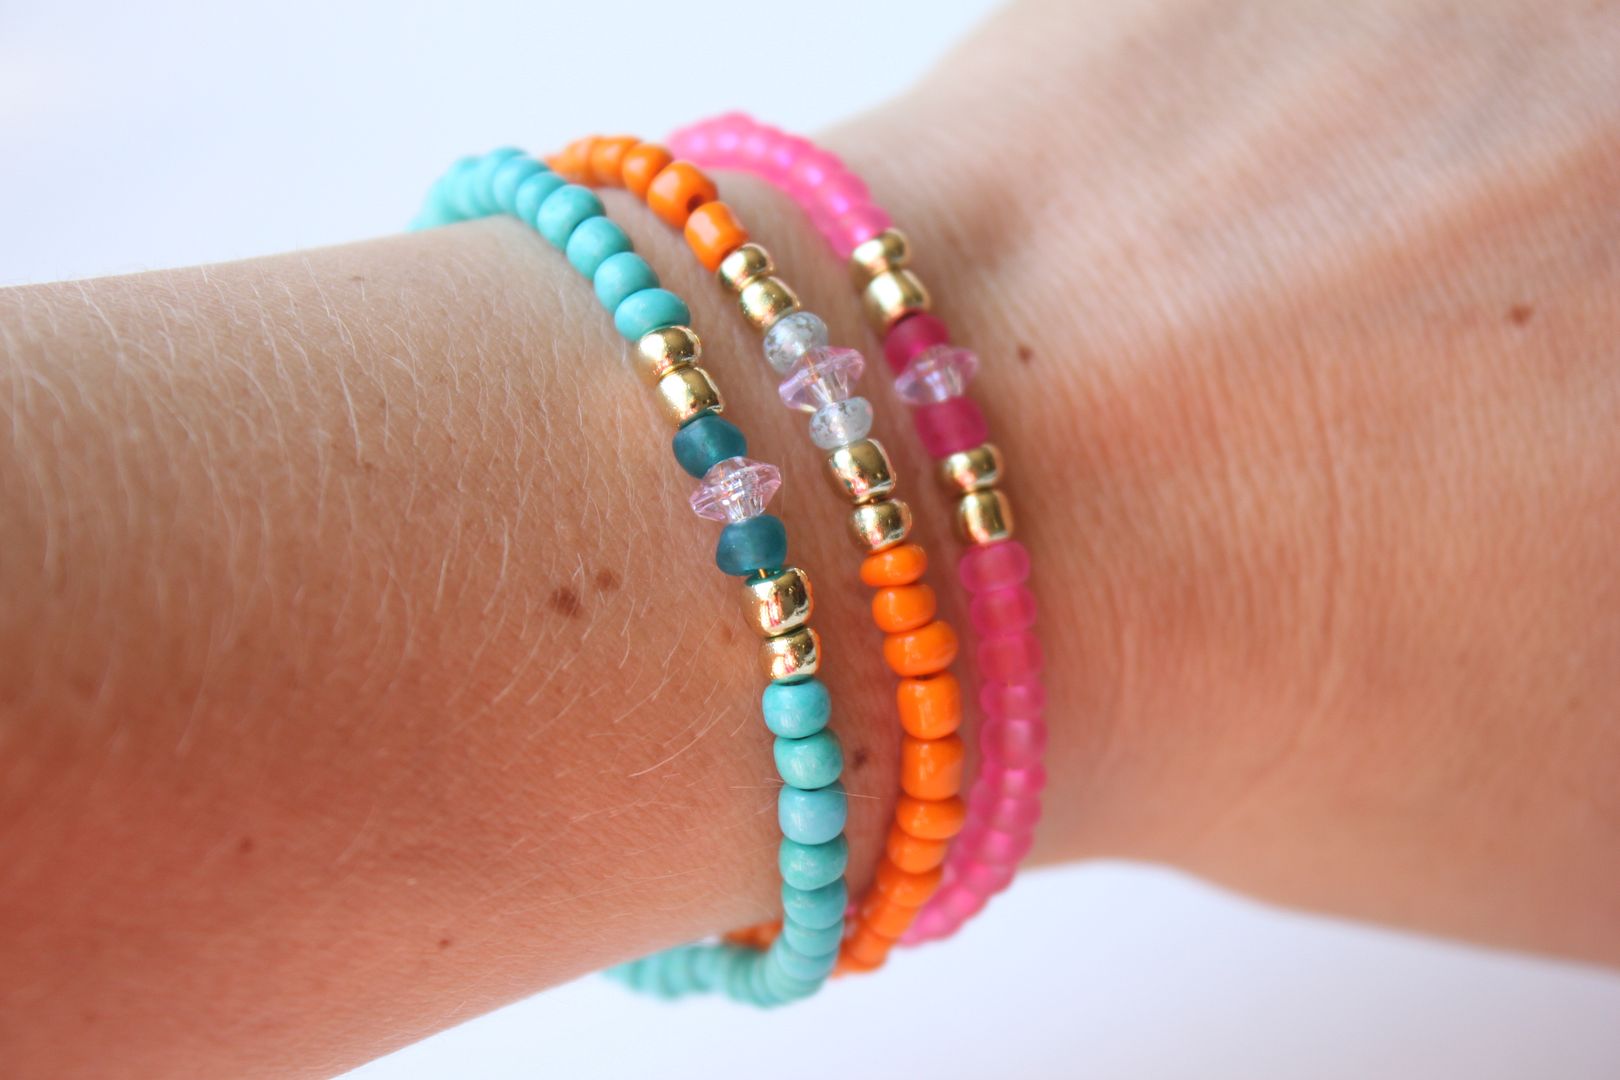
more finished.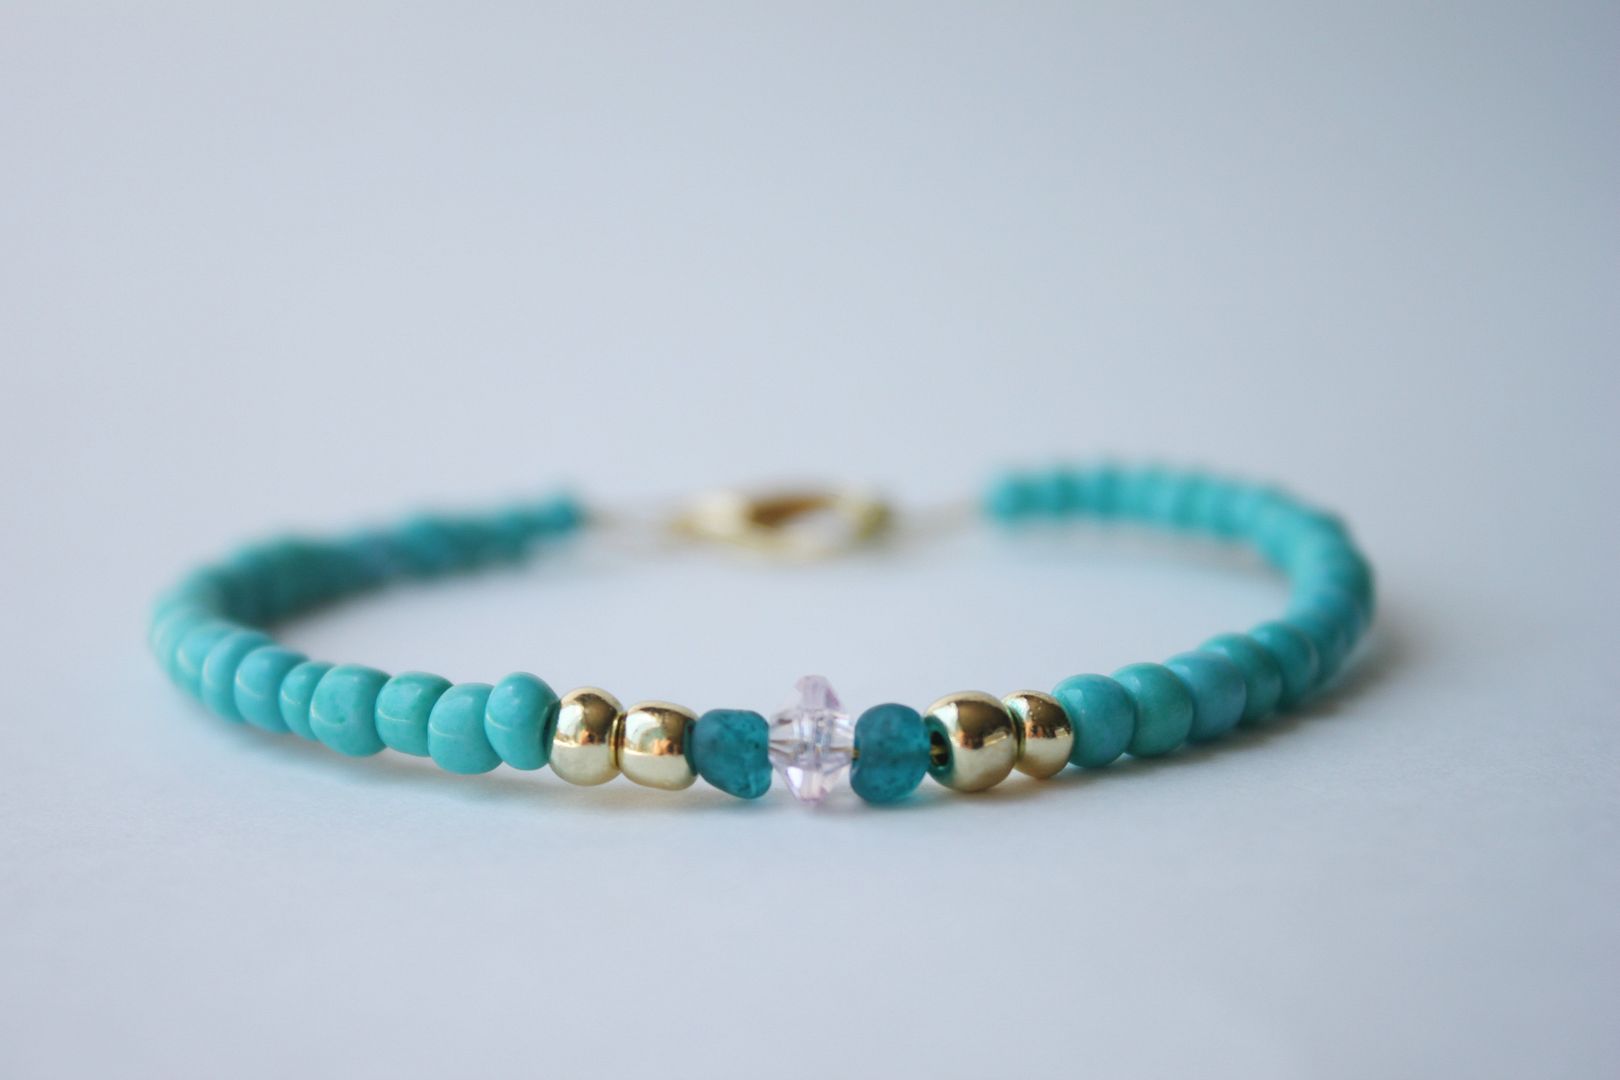 Make as many as you want and stack em on your wrist!
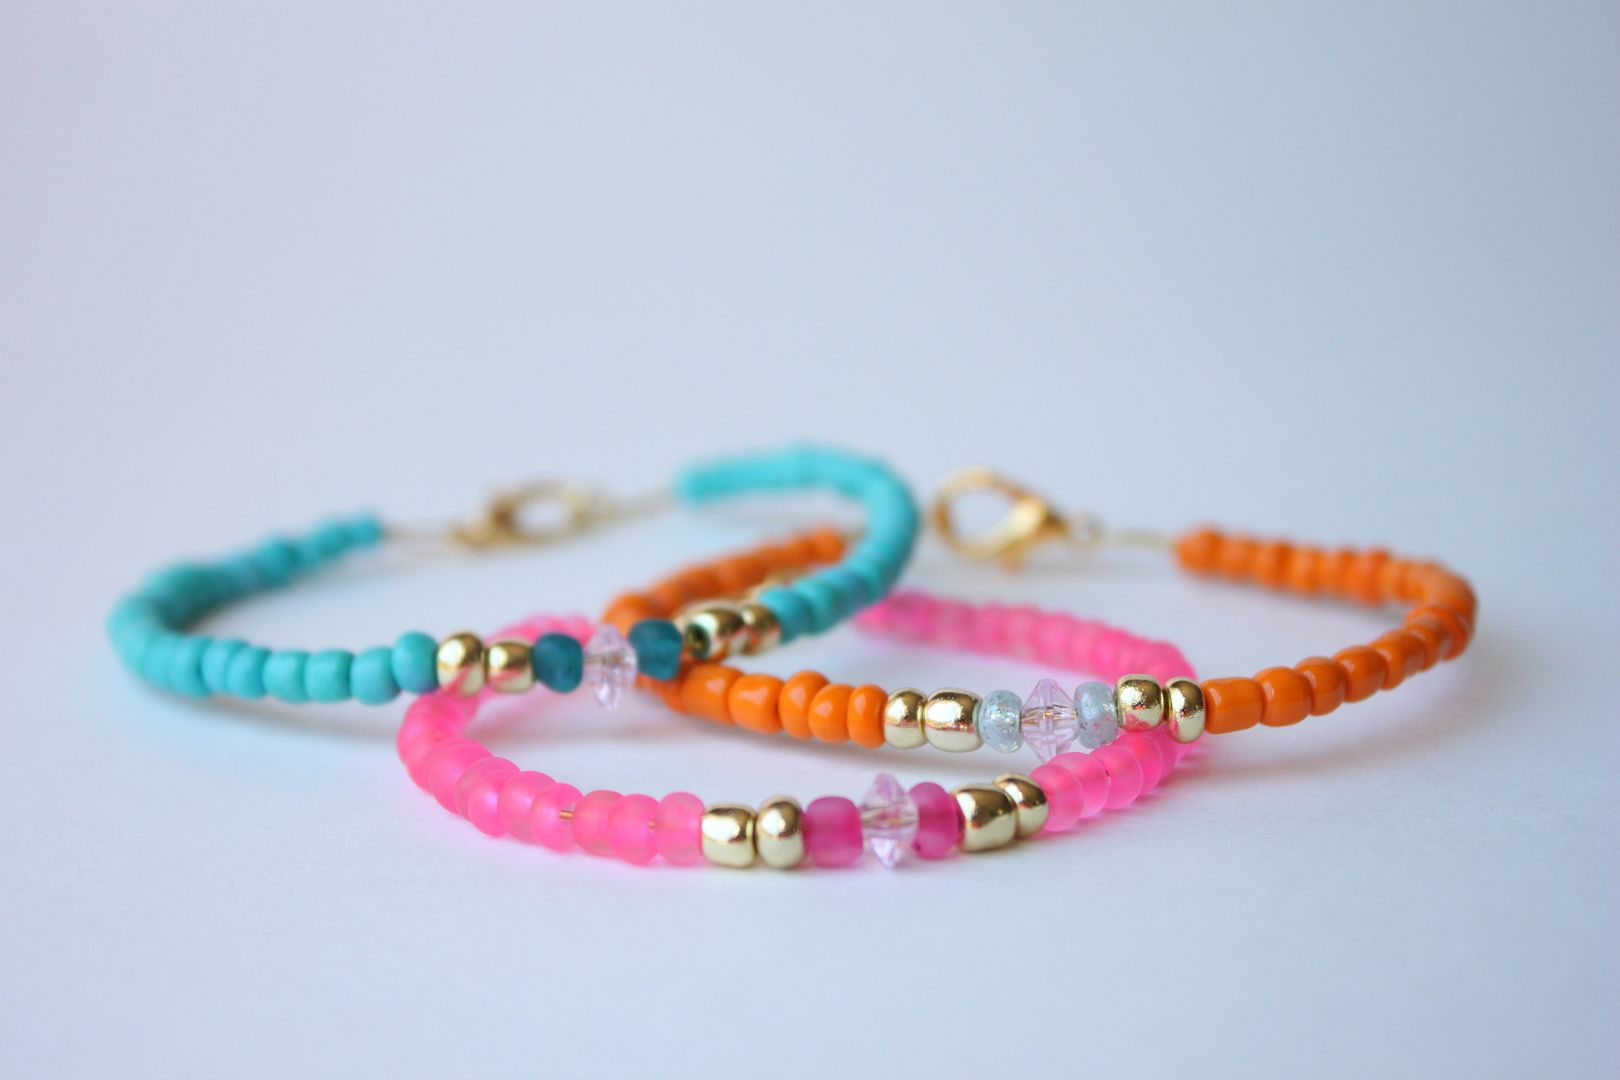
No comments:
Post a Comment